
Google is the most popular search engine in the World. For any kind of information, we search on Google. Google collects the information from a lot of websites that are connected to the Google Search Console. Website owners submit their websites to Google Search Console and the search console crawls the data of the submitted websites. In this article, we are going to learn how to add WordPress site to Google Search Console.
To add a google search console property (a website) to appear on Google search results, we need to follow a few steps mentioned below:
STEP 01: Go to https://search.google.com/search-console/about and the “Start Now” button and log in with a Gmail account to get started.
STEP 02 : Enter your website URL from “URL Prefix” section and click the “Continue” button.
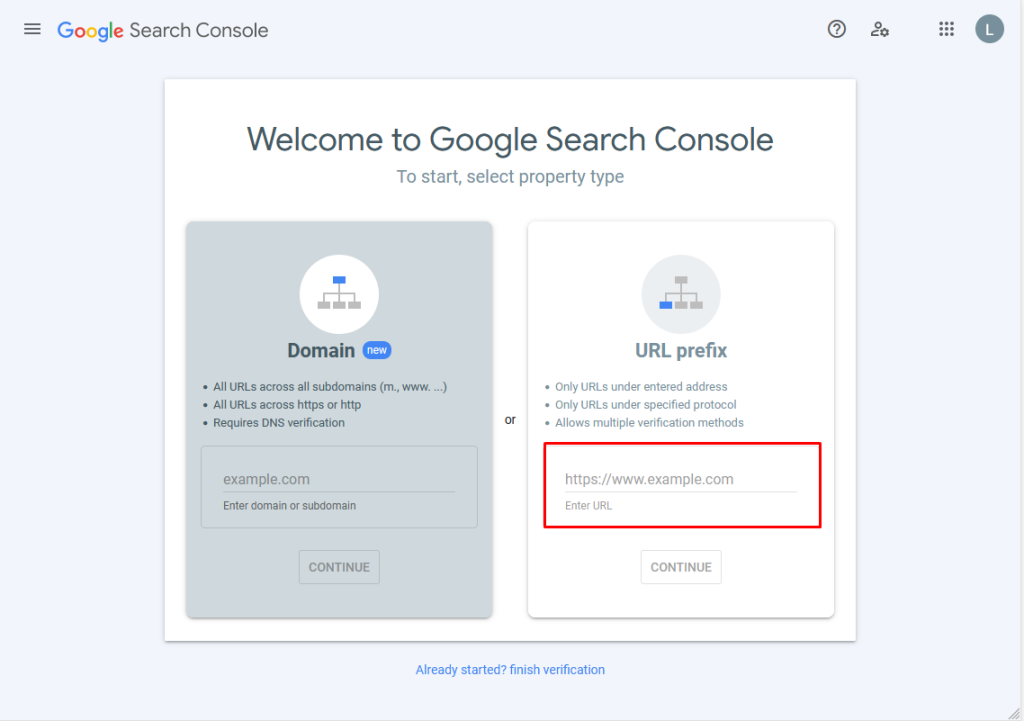
Add WordPress site to Google Search Console
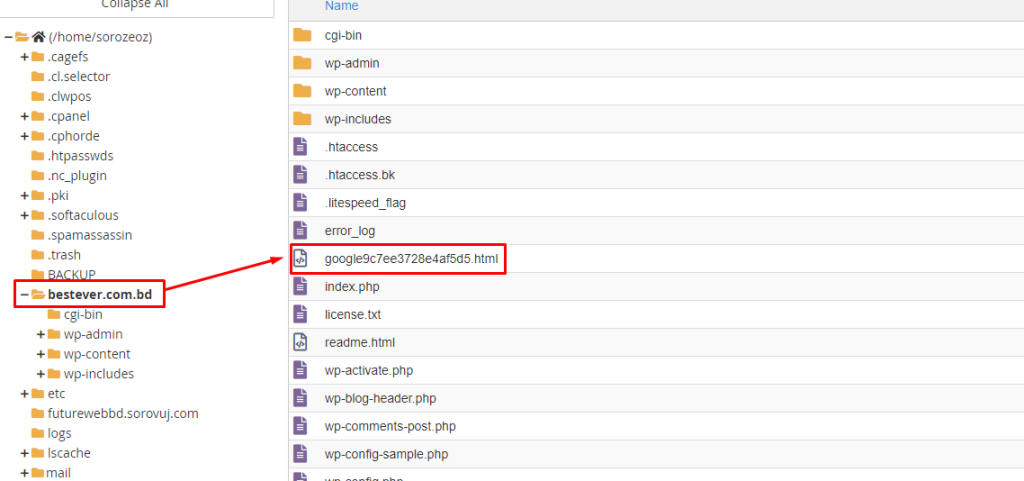
STEP 03 : Download the “HTML file” and upload it to your WordPress website root directory.
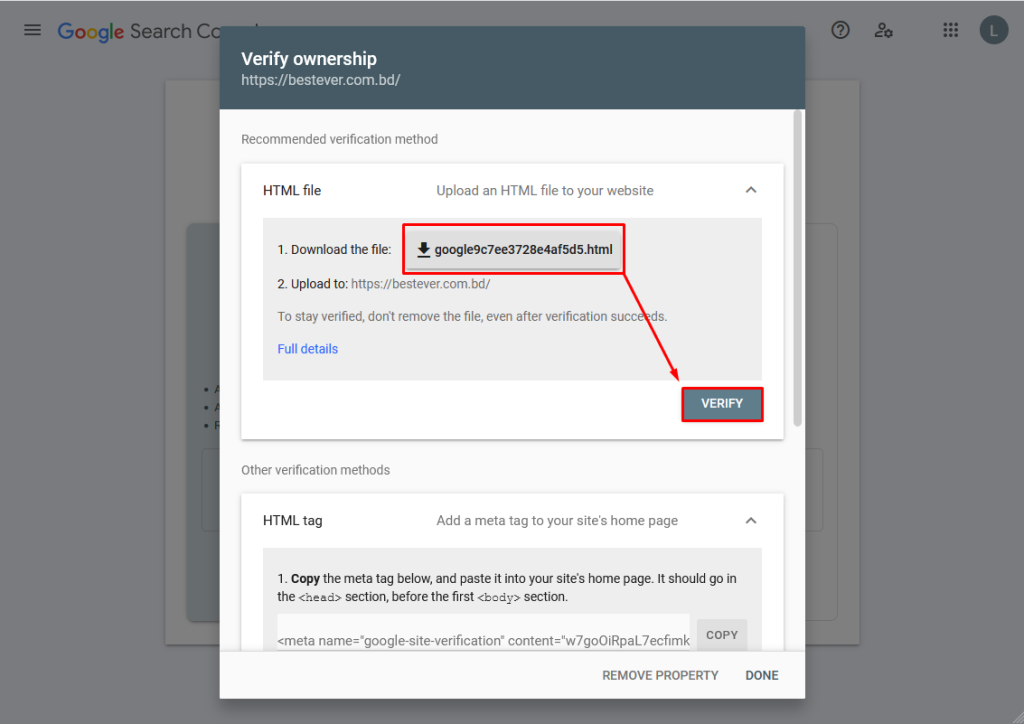
STEP 04 : Click the “Verify” button to finish the verification process and you will see the “Ownership Verified” message. Click the “GO TO PROPERTY” button to see the property you just added.
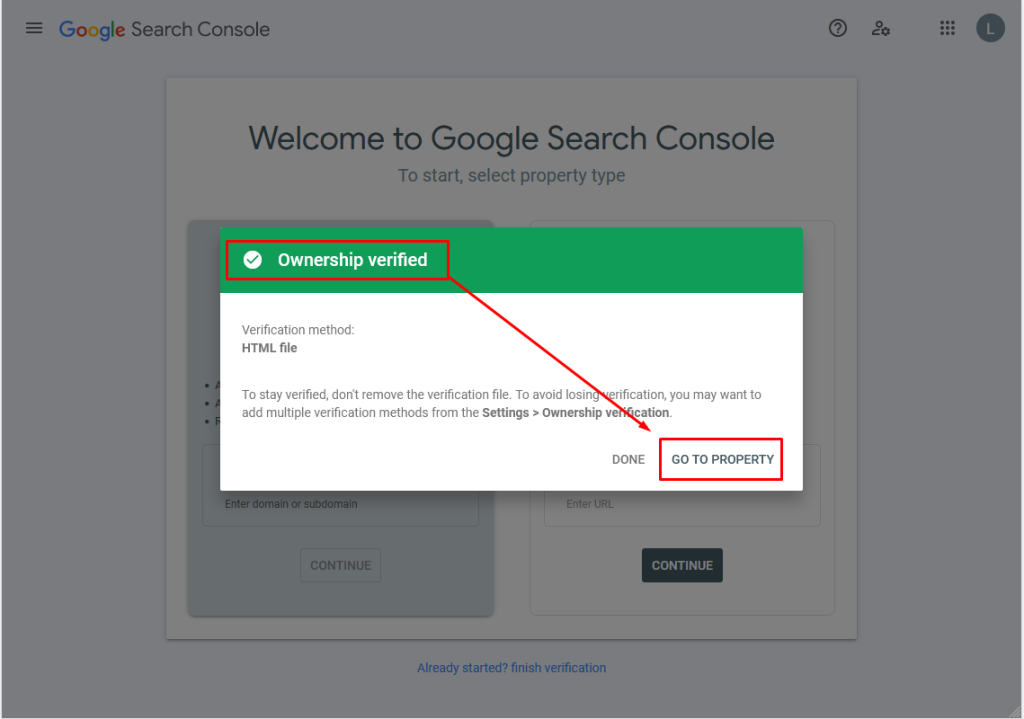
Add WordPress site to Google Search Console
It will take a few days to process the data and then it will start crawling your website. After a few days, you will see your website is appearing in Google search results.
NOTE : If you don’t have the cPanel/control panel access to upload the HTML file, please follow the steps mentioned below:
How to add WordPress site to Google Search Console :
Since you don’t have the control panel access to upload the HTML file, you need to select an additional verification method. In this case, we are going to use “HTML tag” to verify the ownership of our website.
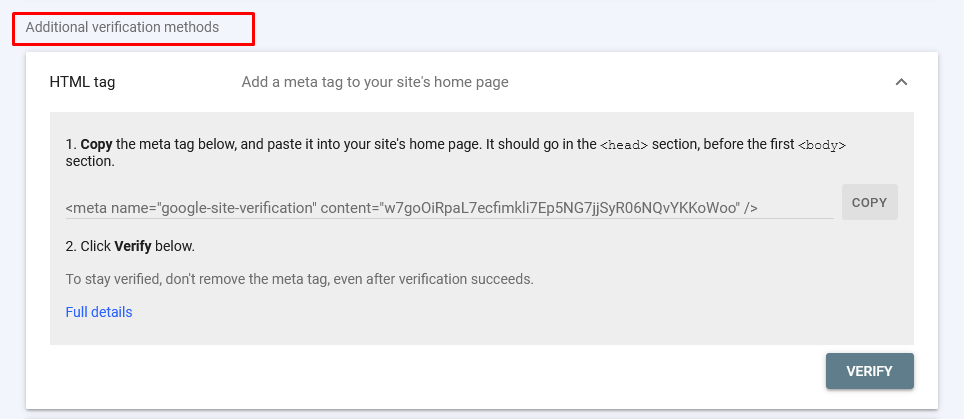
Add WordPress site to Google Search Console
STEP 01 : Log in to your WordPress website dashboard and then click “Plugins“. After that click the “Add New” button to add a new plugin.
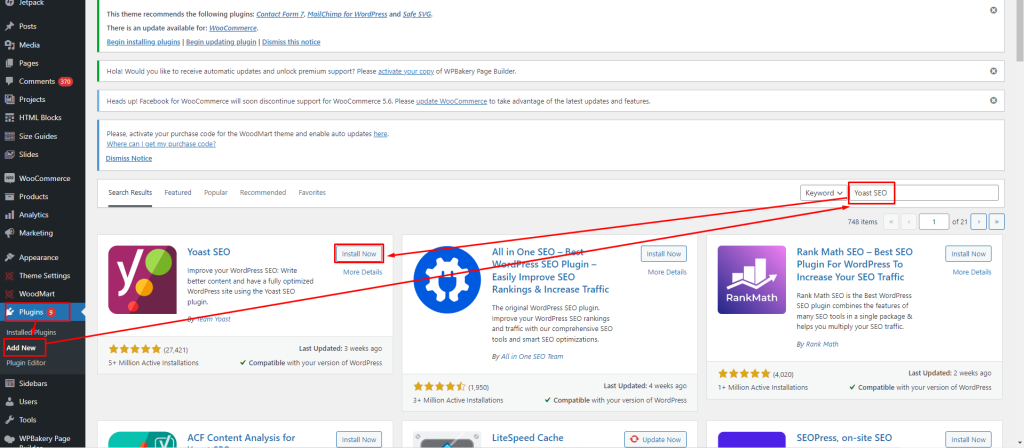
Add WordPress site to Google Search Console
STEP 02 : Search for “Yoast SEO” plugin and install it. Once the installation process is done, you need to activate it by clicking the “Activate” button.
STEP 03 : Once the Yoast SEO plugin is activated, you will see a new option called “SEO” is added to your WordPress dashboard.
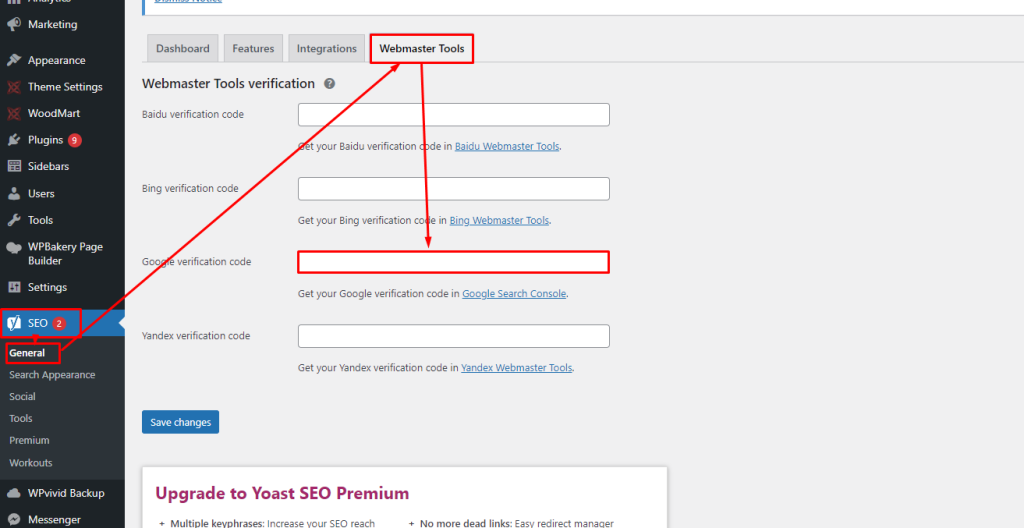
Add WordPress site to Google Search Console
STEP 04 : In this step, you need to copy the HTML tag’s content and paste it to the Google verification code option from the Yoast SEO plugin. Click the “Save Changes” button. Please make sure to copy only the content like the screenshot attached below marked in red color.
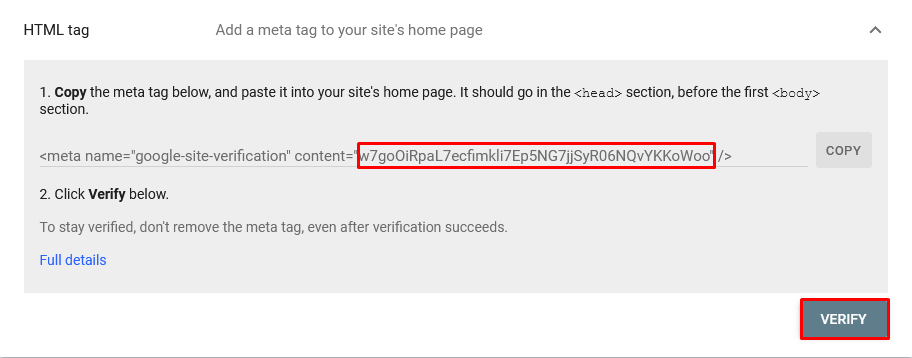
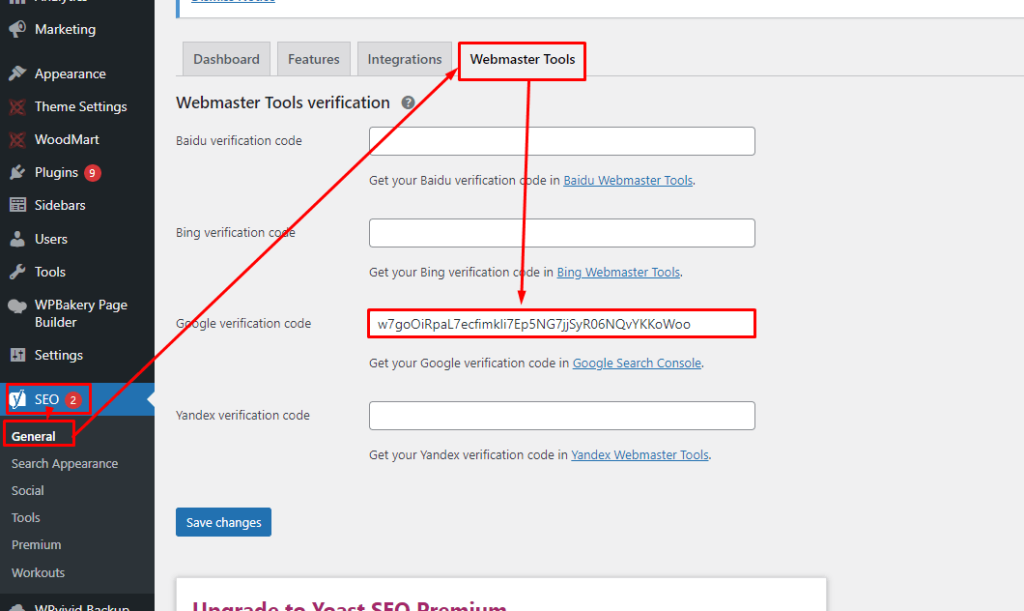
Once again don’t copy the entire meta tag, It’s important. Finally, click the verify button.
Table of Contents :
- How to find out which version of WordPress a site is using
- Change RETURN TO SHOP Link in WooCommerce
- Remove Related Products on WooCommerce
- Change Add to Cart Text in WooCommerce
- Disable Gutenberg Widget Block Editor
- Best Auto Backup & Auto Migration Plugin in WordPress
- How to change WordPress admin password from database
- Fix Error Establishing a Database Connection in WordPress